Fingerprint Time Clock
1.
Using Spectrum TimeClock with a Fingerprint Reader
2
1.2.
The Microsoft Fingerprint Reader
2
1.3.
Microsoft Fingerprint Reader - Default Operation.
2
1.4.
Disabling Microsoft Fingerprint Reader Default Operation.
3
1.5.
Installing Replacement Fingerprint Reader Software.
4
1.6.
Add New Fingerprint Reader Software to the Windows Startup Menu.
6
1.7.
Registering an Employee’s Fingerprints.
8
1.8.
Testing Spectrum TimeClock in Biometric Mode.
11
1.
Using Spectrum TimeClock with a Fingerprint Reader
Click the button below to find out more about Spectrum TimeClock.

1.1. Overview
Spectrum TimeClock has a special biometric input
mode where the system can prevent employees from punching in from a computer
keyboard, and will allow punching in from only a fingerprint reader, a barcode
scanner, or a RFID card scanner.
This mode is known as “biometric only” mode. This mode can not be set from the Spectrum
TimeClock user interface. It can only be
set by Spectrum Research technical support.
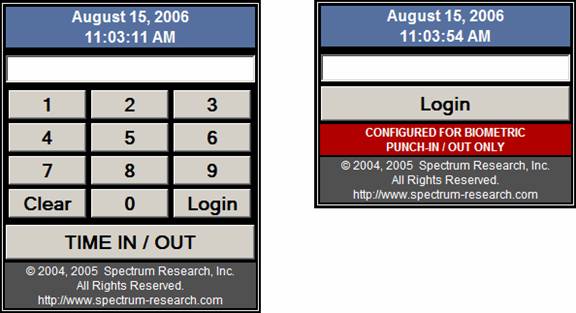
The graphic below on the left shows the punch screen
in normal punch mode. The graphic on the
right shows the punch screen in biometric mode.
1.2. The Microsoft Fingerprint Reader
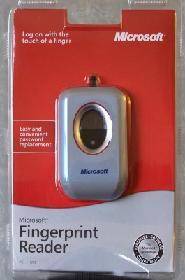 The biometric device most
frequently used with Spectrum TimeClock is the Microsoft Fingerprint Reader. The Microsoft Fingerprint Reader can be
purchased from many office supply stores like Staples, Office Depot, and Office
Max, many computer stores like CompUSA, and other stores like Walmart and Best
Buy.
The biometric device most
frequently used with Spectrum TimeClock is the Microsoft Fingerprint Reader. The Microsoft Fingerprint Reader can be
purchased from many office supply stores like Staples, Office Depot, and Office
Max, many computer stores like CompUSA, and other stores like Walmart and Best
Buy.
It can usually be found for under $50 per reader,
often less after manufacturer rebate.
The Microsoft Fingerprint Reader connects to computers using a USB connection, and runs only on computers running Windows XP Home or Professional (or newer).
1.3. Microsoft Fingerprint Reader - Default Operation
The Microsoft Fingerprint Reader’s default operation
is a 1 to 1 functionality. When a person
is logged into Microsoft Windows, they can use the reader to automatically
login to different websites. However, if
a different person who’s fingers are registered with the reader, places their
finger on the touch pad, the first person will be logged out of windows and the
second person will be logged into windows.
This is called “fast user switching”
Using Microsoft’s default functionality prevents the
fingerprint reader from being used by different employees to punch in and out,
since each different person’s registered finger would force a fast user switch.
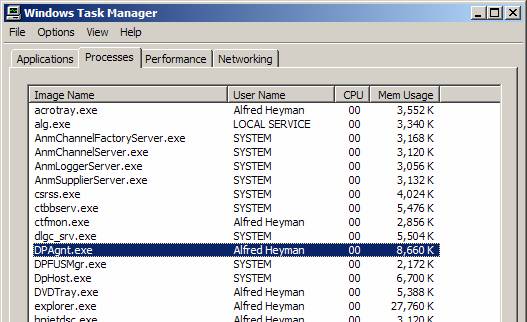
When the Microsoft Fingerprint Reader is running,
you will see the DPAgnt.exe icon in your computer’s tool tray. It’s the icon at left in the image below.
![]()
To use the Microsoft Fingerprint Reader with
Spectrum TimeClock, the highest level Microsoft program that reads the
fingerprints and does a web site login or fast user switch – must be disabled
and replaced with fingerprint reader software that operates using 1 to N
functionality
Fingerprint reader software that uses 1 to N
functionality allows multiple users to login (or punch in when used with
Spectrum TimeClock) without doing a fast task switch.
1.4. Disabling Microsoft Fingerprint Reader Default Operation
The easiest way to disable the Microsoft Fingerprint
Reader’s default operation is to rename the highest level program file.
To do this, the DPAgnt.exe program must first be
terminated.
Step 1: Press Control-Alt-Delete,
so the Windows Task Manager comes up.
Step 2: From the Windows Task
Manager, click on the “Processes” tab.
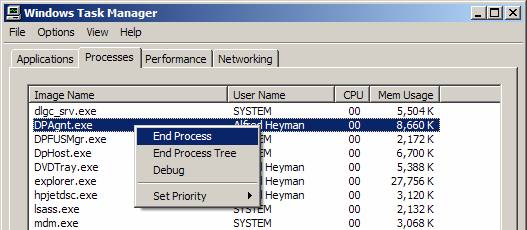
Step 3: Find and highlight
DPAgnt.exe by clicking on it.
Step 4: Right click on DPAgnt.exe,
and click on the “End Process” menu, as seen below.
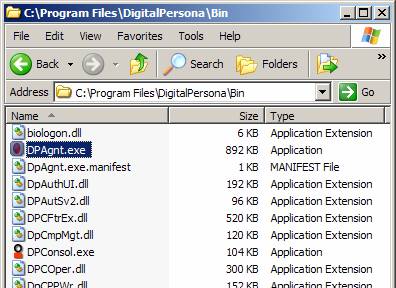
Next, you have to rename the DPAgnt.exe program so
it won’t be loaded at boot up time. The
Microsoft Fingerprint Reader’s program and driver files are located in the “C:\Program
Files\DigitalPersona\Bin” folder on a Windows XP Home or Pro hard disk.
Step 5: Click on the “My Computer”
icon on your desktop.
Step 6: Type into the “Address” bar
input area, and enter “c:\Program Files\DigitalPersona\Bin”
and hit return.
Step 7: Single click on DPAgnt.exe
Step 8: Right click on
DPAgnt.exe. Then click “Rename” from the
popup menu.
Step 9: Change the filename from
DPAgnt.exe to DPAgnt-BAK.exe.
1.5. Installing Replacement Fingerprint Reader Software
You must first obtain the replacement fingerprint
reader software from Spectrum Research, Inc., using instructions provided via
email. Spectrum Research has obtained a
license to redistribute this software for its Spectrum TimeClock software
customers.
After you have obtained the .ZIP file containing the
software, extract all of the zip file’s contents into a folder on your
computer. There are 4 files in the .ZIP
file, 2 .LIC files, a txt file, and an .EXE file.
Step 1: Run the .EXE file.
Step 2: It will prompt you for the language to use. Press OK after you have made your selection.
Step 3: Press “Next” to continue after
that.

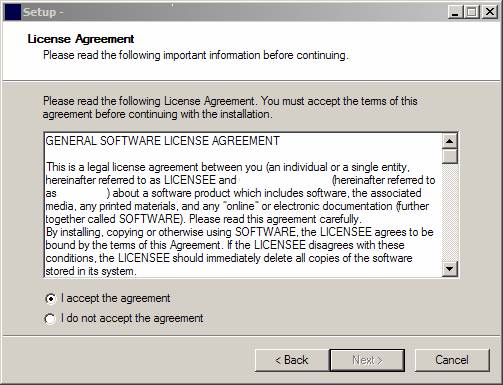
Step 4: As seen in the image below,
read the software license, select “I accept the agreement”
and
click the “Next >” button to continue.
Step 5: You will see a 2nd
license screen. Do the same thing.
Step 6: Click “Next >” again
after reviewing the feature list.
Step 7: Finally, click the “Next
>” button on the “Select Destination Location” screen of the
installation wizard.
Step 8: Select “Install
Applications Only” and press “Next > “.
Step 9: Click “Next >“ on the
“Select Start Menu Folder” screen.
Step 10: Click “Install”.
Step 11: Click “OK” when prompted to
install the fingerprint reader if it hasn’t been done yet.
Step 12: Click “Next >“ on the
Information screen.
Step 13: Select “Yes, restart the
computer now” and press “Finish” on the final installation
screen.
1.6. Add New Fingerprint Reader Software to the Windows Startup Menu
Now, you need to make sure that the fingerprint
reader software is added to the Windows Startup Menu. To do this, do the following:
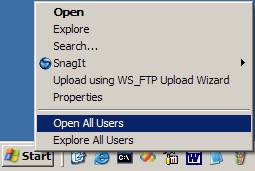
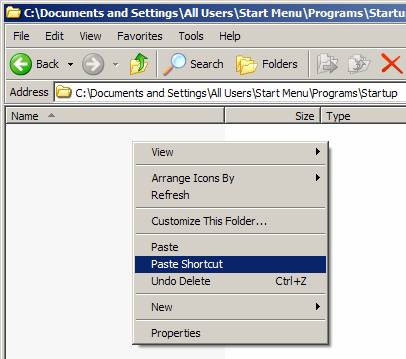
Step 1: As seen below, right Click
on the Windows “Start” menu, and select “Open All Users”.
Step 2: Double Click on “Programs”.
Step 3: Double Click on “Startup”
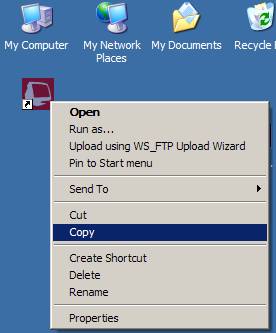
Step 4: Now, from the Windows
Desktop, right click on the fingerprint reader software’s new red
monitor
screen icon, and click the “Copy” menu as seen below.
Step 5: Switch back over to the
Windows Startup editing screen, right click, and select the
“Paste Shortcut” menu, as seen below.
Step 6: The new fingerprint reader
software will now load each time you reboot your computer.
Reboot your computer again, or click on the new red screen icon on your
desktop to start
the fingerprint reader software.
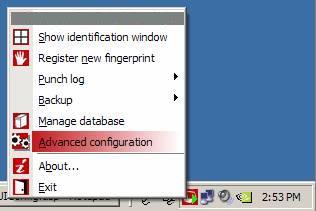
Step 7: You must configure the
fingerprint reader software to insert an “Enter” key after inputting
the employee’s Punch-ID into Spectrum TimeClock. To do this, right click on the
fingerprint reader software’s tool
try icon and select “Advanced Configuration”, as seen
below.
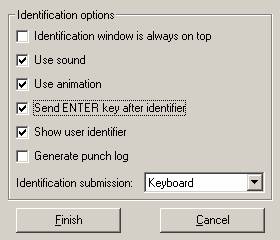
Step 8: Select the options as seen below, and press
“Finish”. The most important option to
check is the one to “Send ENTER key after identifier” option.
1.7. Registering an Employee’s Fingerprints
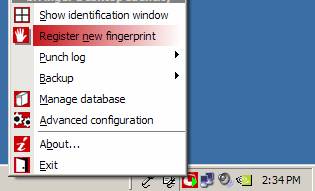
Before using fingerprint reader to punch in and out
of Spectrum TimeClock, register a user’s fingerprints. To do this, right click on the red screen
icon in your tool-tray, and click on the “Register New Fingerprint” menu as
seen below.
Step 1: When the “Identity
Fingerprint Registration Wizard” loads, press the “Next >” button two
times.
Step 2: Enter the name of the person.
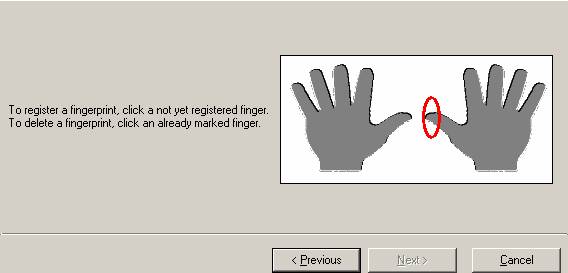
Step 3: As seen in the image below, move the mouse
cursor over a finger that you want to
register for the employee, and click on the finger.
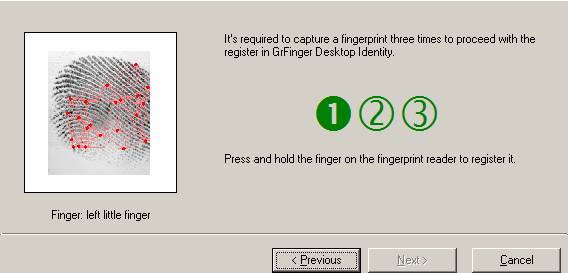
Step 4: The employee will have to
place their finger on the touch pad 3 times as seen below.
Have them place it on the touch pad as straight as possible.
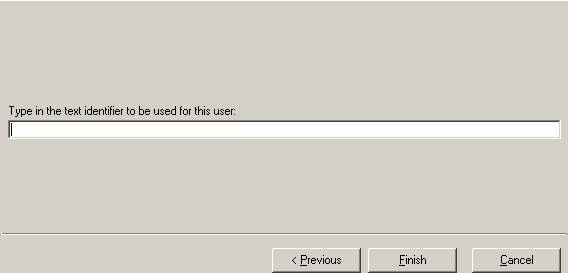
Step 5: Enter the employee’s
Spectrum TimeClock Punch-ID on the next screen, as seen below.
Click “Finish” once this has been done.
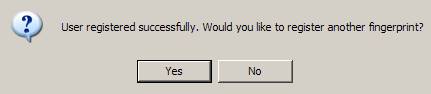
Step 6: Additional fingers can be registered as seen below.
Step 7: Register fingers from all
employees from the same workstations that they will be
punching
in from. Fingerprints biometric data is
stored on the local machine and is
not networked. Employee’s will
not be able to punch in from any computer that their
fingers aren’t registered on.
1.8. Testing Spectrum TimeClock in Biometric Mode
At this point, you will need to call or write
Spectrum Research, Inc. and ask them to place your timeclock into “biometric mode”. Once in biometric mode, simply refresh the
timeclock punch screen in your web browser window.
After your web browser has Spectrum TimeClock loaded
in biometric mode, simply have an employee place one of their registered
fingers on the touch pad. Their finger
should be as straight on the pad as possible.
The very first time that the fingerprint reader and
software are used to punch in, you may get an error message saying that the
fingerprint input was outside of expected parameters. This seems to be because the fingerprint
reader software has to set some configuration data the very first time it
runs. This should not occur after the
first time.
- end -